How to Create an AWS Account A Step-by-Step Guide
In this tutorial, you will set up your AWS account and development environment. This will allow you to interact with your AWS account and programmatically provision any resources you need.
What you will accomplish
In this module, you will:
- Sign up for an AWS account
- Validate your contact details through a phone call or SMS
Implementation
An AWS account is the starting point to allow provisioning infrastructure. In this module, we cover how to set up your account.
Select email , account name, password
To create a new AWS account, go to aws.amazon.comand choose Create an AWS Account.
1 - Enter an email address and an account name.
- Carefully consider which email address you want to use. If you are setting up for a personal account, we don't recommend using a work email address because you may change jobs at some point. Conversely, for business accounts, we recommend using an email alias that can be managed because the person setting up the account may, at some point, change roles or companies.
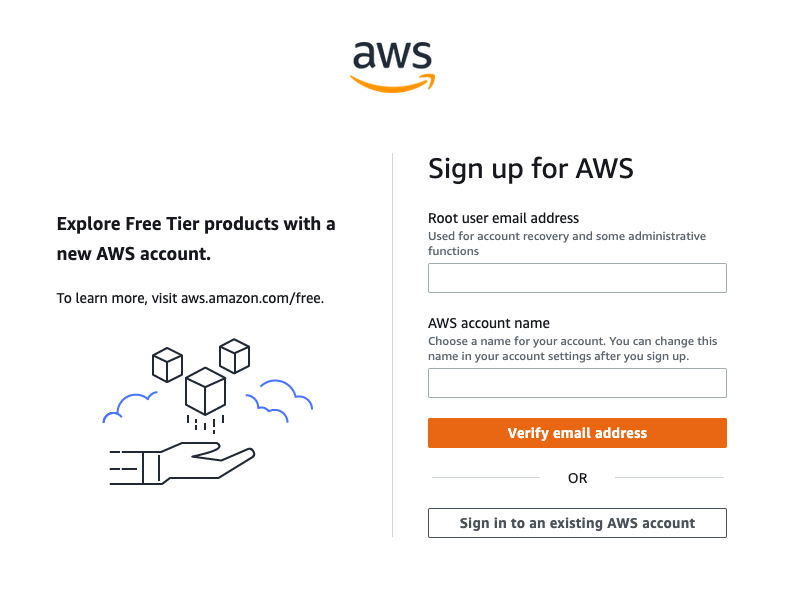
2 - Select Verify email address.
- You will get a verification code in your email. Enter the verification code and choose Verify.
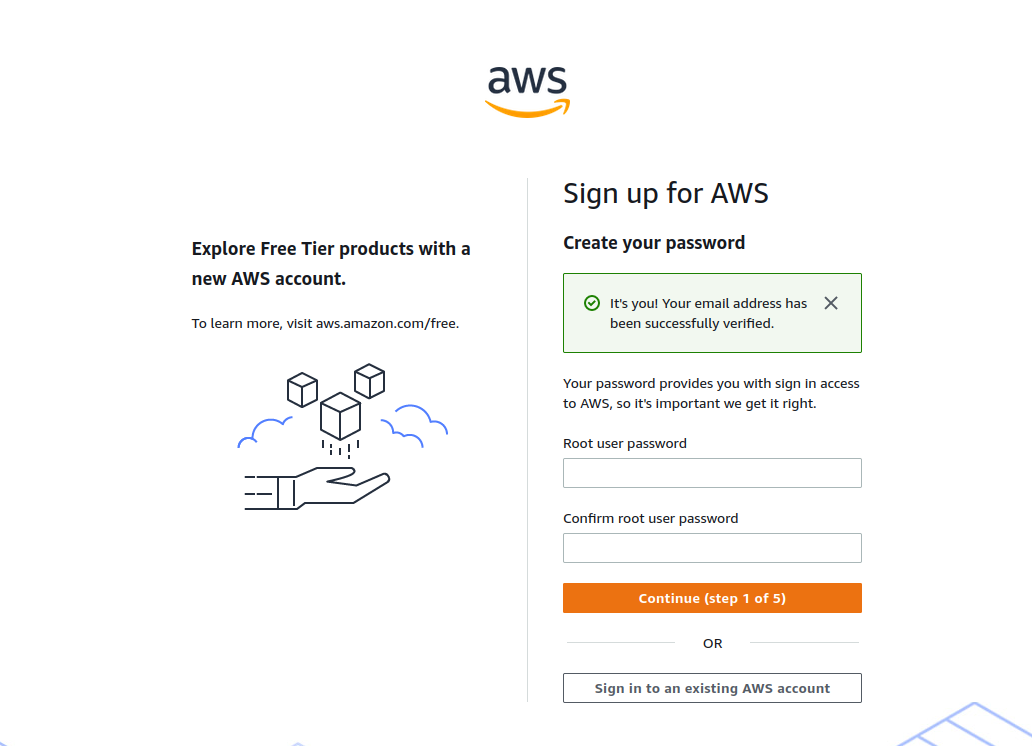
You will be redirected to a new screen where you will create your root user password.
1.3 - Create your root user password.
- The password you choose is extremely sensitive, and should be shared only with people who have access to the credit card that will be used on this account.
- Your password must include: uppercase letters, lowercase letters, numbers, and non-alphabetic characters.
1.4 - Once you have entered and confirmed your password, choose Continue (step 1 of 5).
Add contact information
Now you need to add your contact information and select how you plan to use AWS.
1 - Choose between a business or personal account.
- There is no difference in account type or functionality, but there is a difference in the type of information required to open the account for billing purposes.
- For a business account, choose a phone number that is tied to the business and can be reached if the person setting up the account is not available.
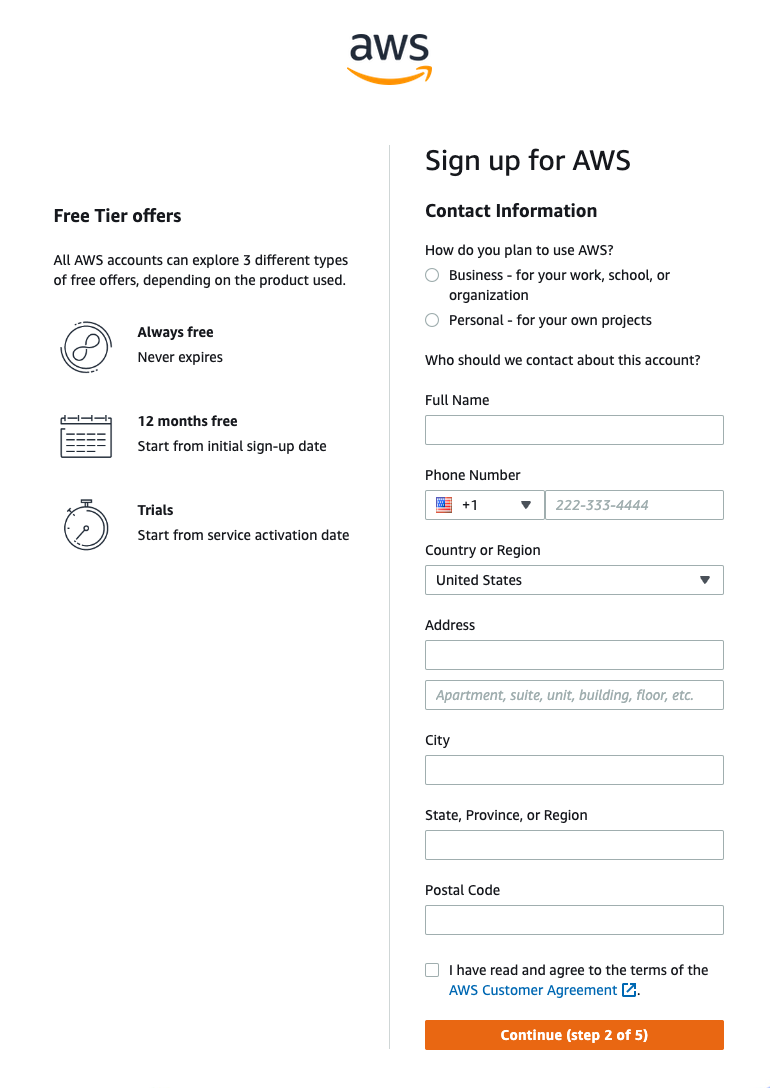
2 - Once you have selected the account type, fill out the the contact information about the account.
- Save these details in a safe place. If you ever lose access to the email or your two-factor authentication device, AWS Support can use these details to confirm your identity.
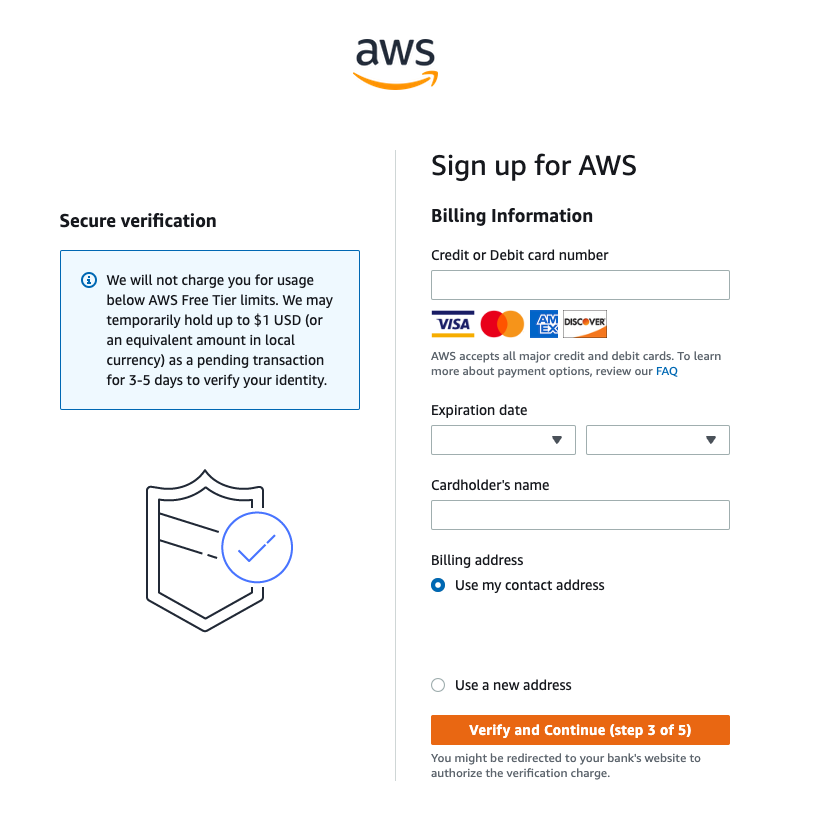
Add payment method
In the following screen, add your preferred credit or debit card to use for payment.
1 - Enter your Billing Information details.
- A small hold will be placed on the card, so the address must match what your financial institution has on file for you or your business.
2 - Select Verify and Continue (step 3 of 5) to proceed.
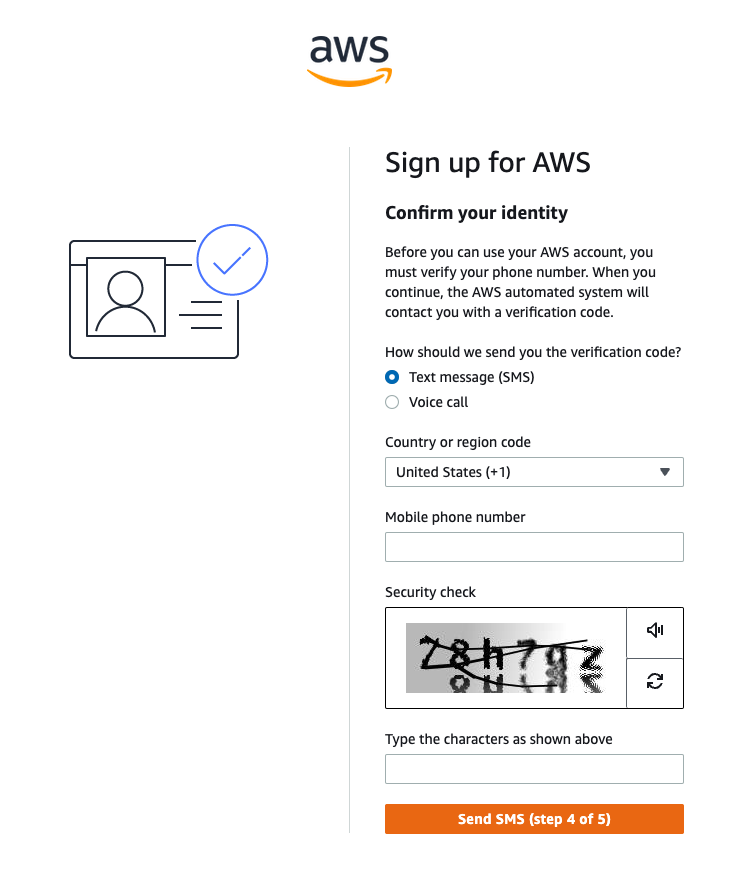
Confirm your identity
Now you need to verify your account.
1 - Choose how you want to confirm your identity.
- You can verify your account either through a text message (SMS) or a voice call on the number you are associating with this account.
- For the text message (SMS) option, you will be sent a numeric code to enter on the next screen after you choose Send SMS.
- For the Voice call option, you will be shown a code on the screen to enter after being prompted by the automated voice verification system.
2 - Enter the code as appropriate for your verification choice, then choose Continue to proceed to the final step.
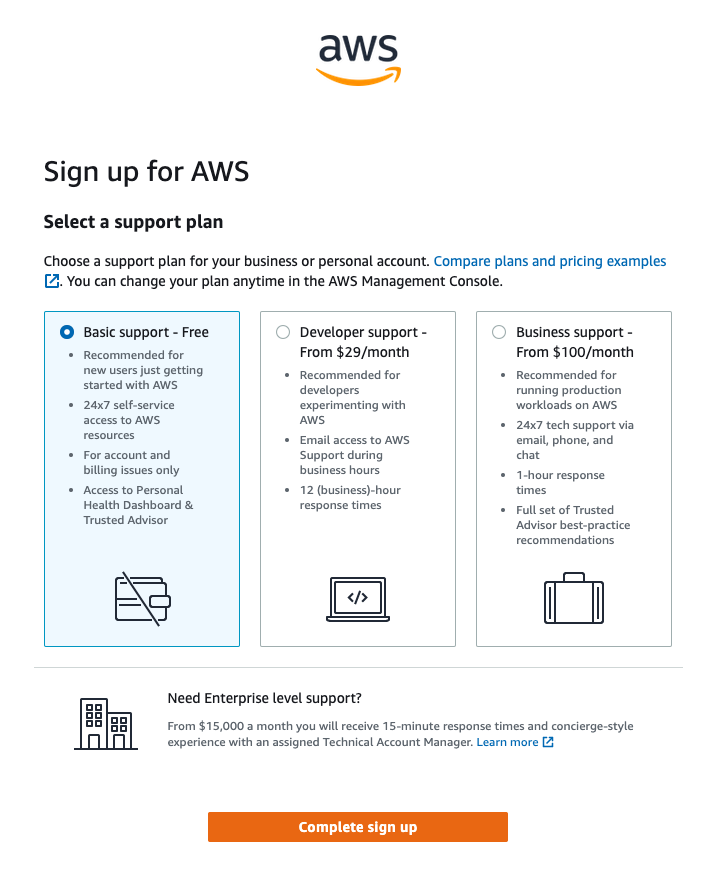
Suuport plan
Choose a support plan for your AWS account.
1 - Choose a support plan. For this tutorial, we recommend the default selection.
- You have three options for support plans. The default option is called Basic Support and is free of charge. If you are not sure, select Basic Support. You can always change support tiers at a later date.
To see the full list of differences between the tiers, see Compare AWS Support Plans.
2 - To finish creating your account, choose Complete sign up.
Conclusion
Congratulations! Your account is now set up and being activated. When activation is complete, you will receive an email from AWS. Use the credentials you created in this module to log in to your root account.
AWS DevOps course
Enroll now to get cerificate
